Introduction: AI Agents
A AI Agents on the Evoya Platform is an AI-driven chat agent that can perform a variety of tasks to automate your business processes. These agents can be deployed in various areas, such as customer service, to assist with administrative tasks or to provide automated help systems.
Examples of AI Agents:
- Customer Service Agent: Automates responses to common customer inquiries, ensuring faster response times.
- Admin Assistance Agent: Helps manage and organize administrative tasks, such as scheduling or document management.
- FAQ Agent: Provides users with automated answers to frequently asked questions.
Creating a New AI Agents
Setting up a new agent on the Evoya Platform is straightforward and can be done in a few steps.
Step 1: Create Agent
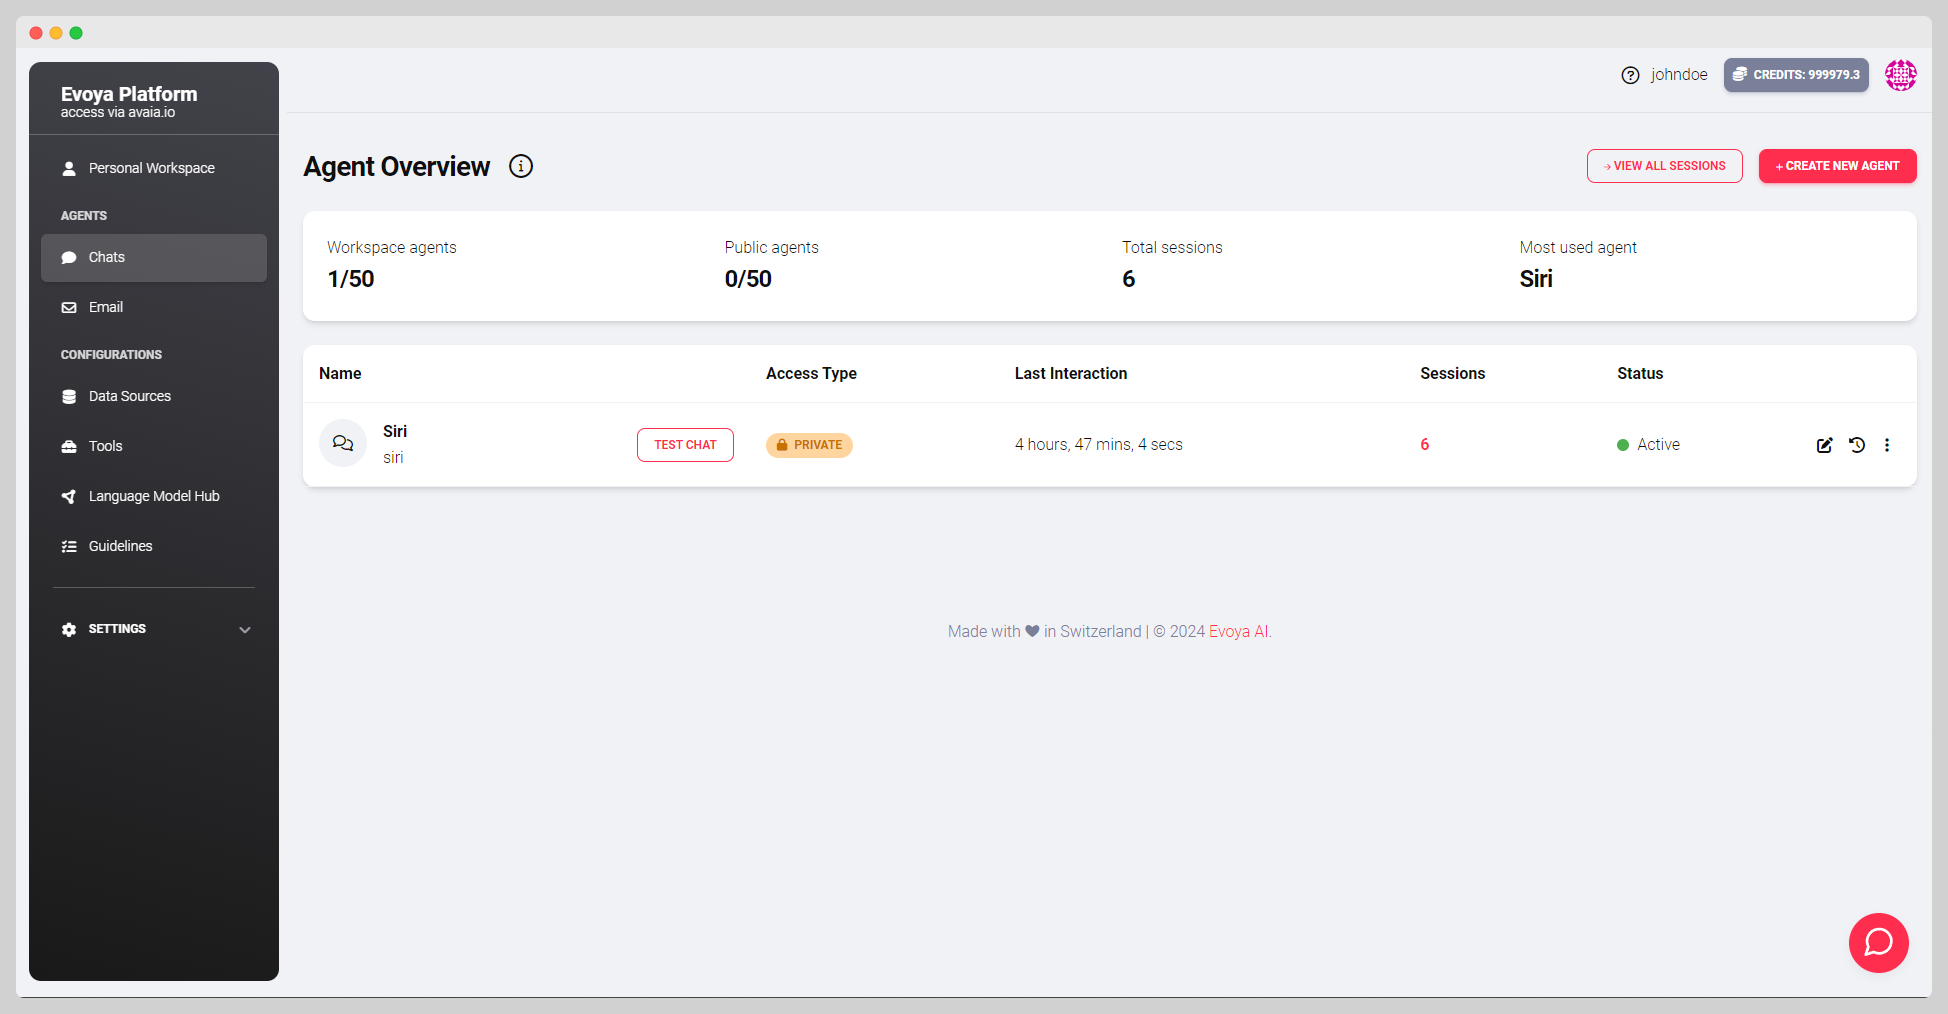
To create a new agent, click the “+ Agent” button on the Agent Overview Page. This will take you to a configuration page where you can make all the necessary settings.

Step 2: Add Basic Information
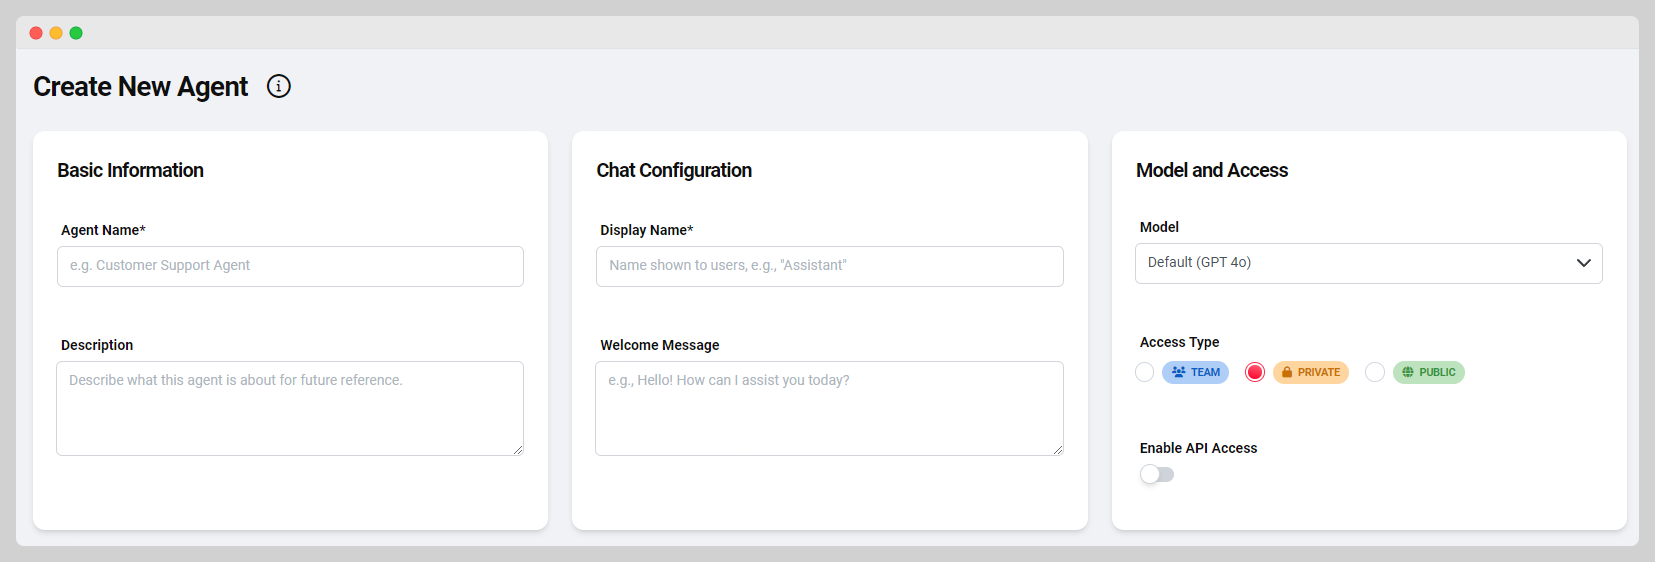
Give your agent a name and add an internal description to define the agent's purpose. This description helps you easily recognize the agent later.
Step 3: Chat Configurations
In this step, you can set the display name that will be shown to users in the chat window and define a welcome message that greets the user when the chat begins.
Step 4: Model and Access
Select the language model your agent should use. You can choose from various models like OpenAI, Google, or Meta. Also, determine the access type for the agent: Team, Private, or Public. Additionally, you can specify whether the agent can be accessed via our API, which is particularly useful if the agent is to be integrated into external systems.

Step 5: Configure Agent Behavior
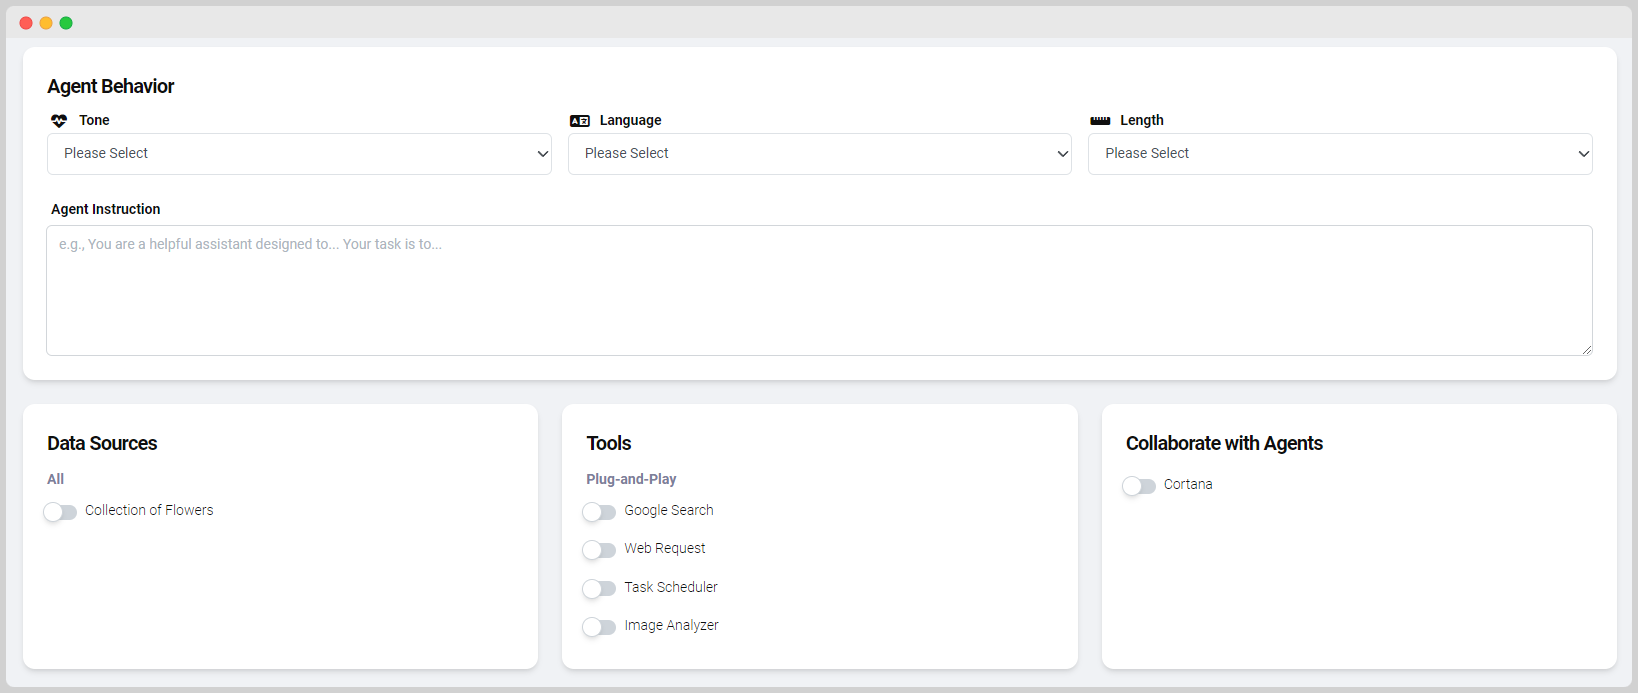
Define the agent's behavior, including tone and language, response length, and the prompt (the instruction to the agent). Here, you can also activate or deactivate guidelines to ensure consistent responses.
Step 6: Assign Data Sources
Specify which data sources the agent should use. These can include web data, files, or raw text files. These data sources are made available to the agent to provide relevant information. More details on configuring data sources can be found on the Database page.
Step 7: Add Tools
Add tools that the agent can use to perform specific tasks, such as scraping web data, processing files, or executing custom scripts. More details on configuring tools can be found on the Tools page.
Step 8: Collaborate with Other Agents
Use the collaboration feature to allow your agent to work with other agents. This feature enables more efficient resolution of complex tasks by combining the capabilities of multiple agents.

Interacting with Chat Agents
There are various ways you and your team can interact with chat agents on the Evoya Platform. Depending on your needs, you can choose the appropriate method:
- Chat Window: The simplest way to communicate with an agent is through the chat window on the Evoya Platform.
- Embedding on Websites: You can also embed the chat agent on a website or in a web application, allowing multiple users or employees to access it. This is particularly useful if you want to make an agent accessible to an entire department or a larger team. The major advantage is that users do not need to create an additional platform login—they can interact with the agent directly and easily.
- API Access: Use our API to integrate agents into external IT systems and control them there.
- Slack Integration: If you use Slack, you can also control your agents directly through Slack and integrate them into your workflows.