Introduction: Email Automation
The email automation feature on the Evoya Platform allows you to categorize incoming emails and respond to them automatically. These functions help reduce workload and increase communication efficiency. There are two main features available: Email Categorization and Email Response.
Step 1: Mailbox and Task Overview
First, you need to connect a mailbox with the Evoya Platform, after which you will receive an overview of all connected mailboxes and existing email automation tasks. This is done through the Mailbox and Task Overview. Here you can:
- Add Mailbox: Add a new mailbox by entering the email address, IMAP username, IMAP password, and IMAP and SMTP server information.
- Task Automation: In this area, you can view and manage all existing email automation tasks.

Step 2: Define Tasks
In the task overview, you can create new automation tasks by clicking the + Task button. You will then be taken to the Task Creation Page, where you can choose from the following options:
Email Categorization
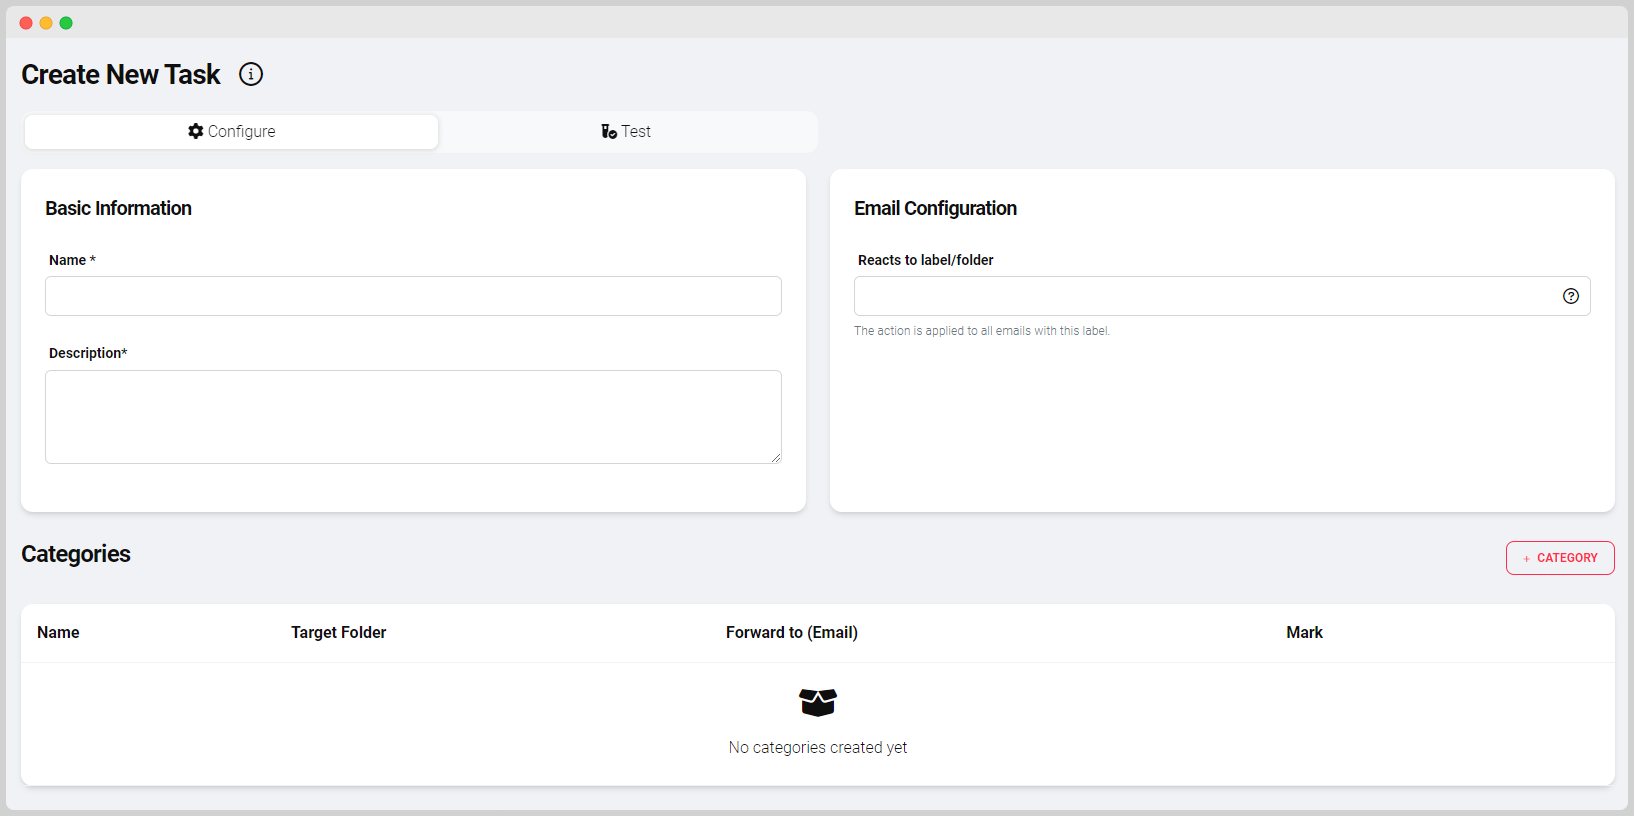
Email categorization allows you to automatically assign emails to a specific category, helping you keep track of your inbox. You can create this task on the Task Creation Page.
- Create Task: Choose the option to create an email categorization. Give the task a name and description.
- Select Folder: Choose the email folder to which this task should be applied (entire inbox or specific subfolders).
- Define Categorizations:
- Add different categorizations such as Newsletter, Spam, etc. Provide a description for each category so the agent can recognize which emails should be assigned to this category. For example, describe the characteristics that identify an email as a Newsletter so the agent can categorize it correctly.
- Define the target folder for each category and specify how the email should be marked (e.g., as read, starred, deleted).
- Optional: Forward the email to another email address.

Email Response
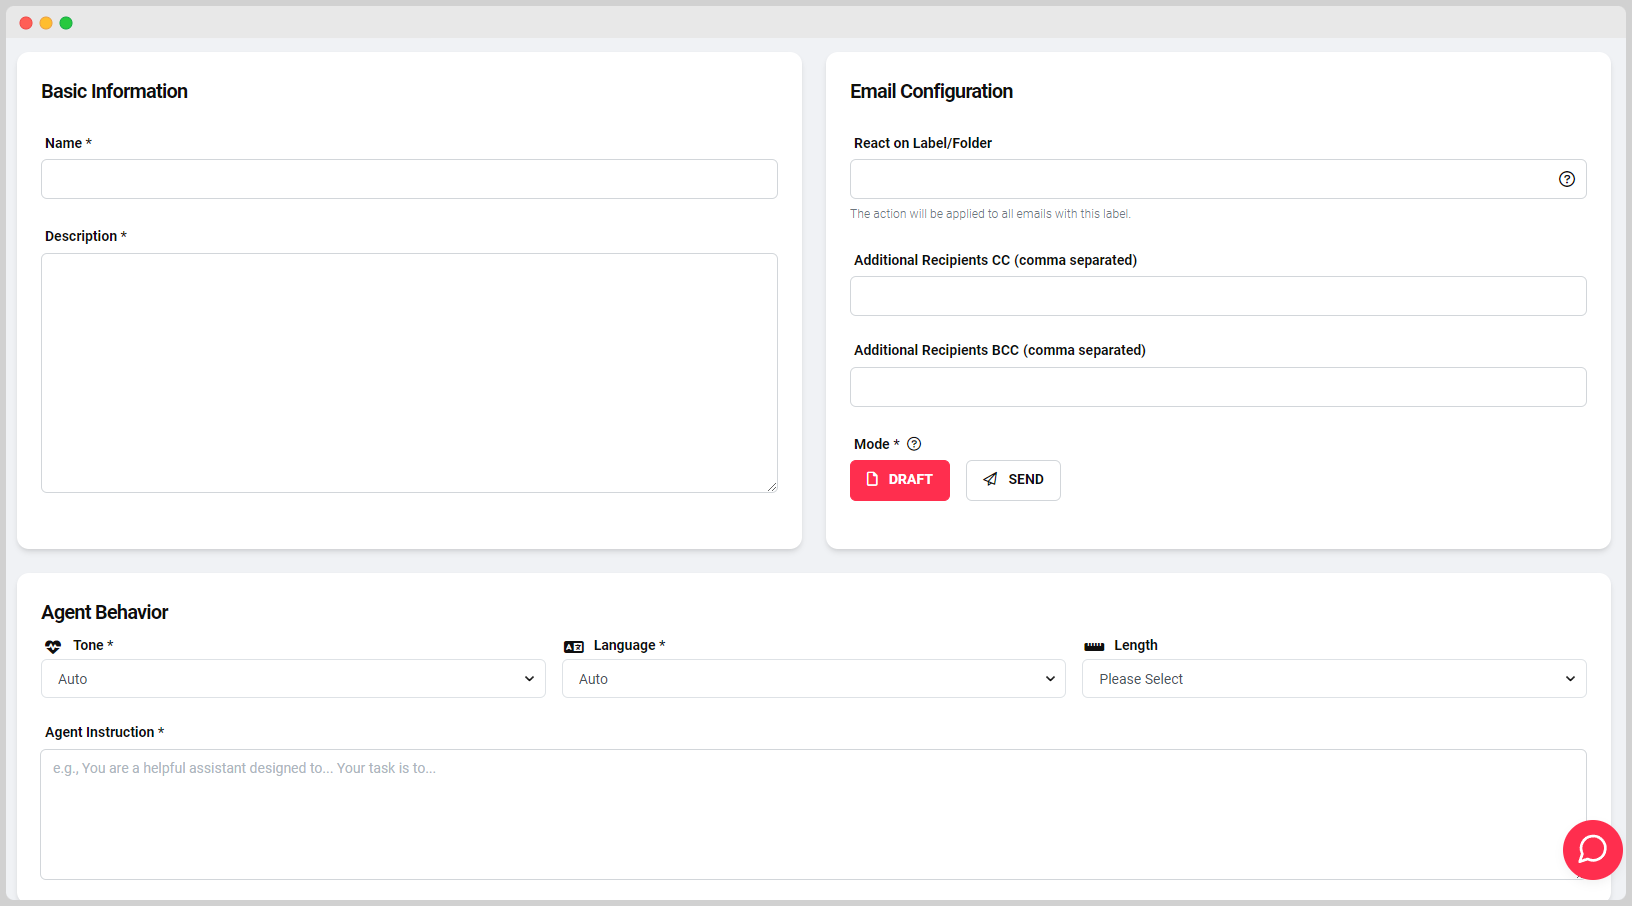
Email response allows you to specify how your agent should automatically respond to incoming emails. You can create this task on the Task Creation Page.
- Create Task: Choose the option to create an email response. Give the task a name and description.
- Select Folder: Choose the email folder to which this task should be applied.
- Set Response Mode: Decide whether the email should be saved as a draft or sent directly.
- Add CC/BCC: Optionally, you can set CC or BCC recipients for the response.
- Define Agent Behavior:
- Specify how the agent should respond to the email, including tone, language, response length, and specific instructions.
- Use the previously defined agent behavior to ensure consistent and targeted responses.

Use Templates
If you do not want to create email categorization or response from scratch, you can also use existing templates on the Task Creation Page. These templates offer a quick and easy way to implement proven processes. Simply select a template, customize it if necessary, and save the task.

Activity Log
Through the Mailbox and Task Overview, you can access the Activity Log, which provides a detailed overview of which emails have been categorized or responded to and what actions have been automatically performed. You can find the activity log via the corresponding button in the task overview or directly through this link.
Activating and Managing Tasks
Once the tasks are created, you can activate and manage them through the Mailbox and Task Overview. There, you have a central overview and can turn tasks on or off as needed.