Email Categorization
With email categorization, the AI automatically assigns incoming emails to categories and performs the actions defined for each category – such as moving, forwarding, or marking. This keeps your inbox organized and routes important messages to the right place.
Basic information
In the first section, you define the basic configuration of the categorization task.
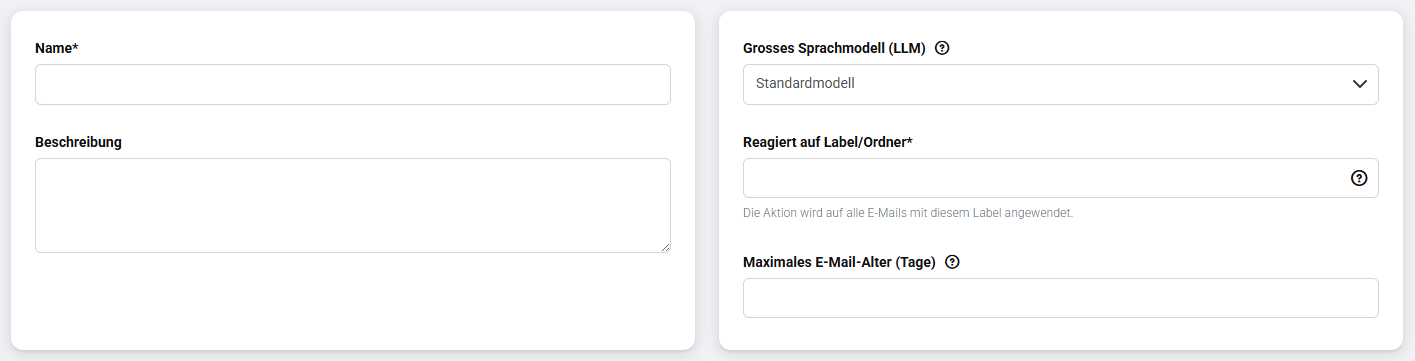
- Name – give the task a meaningful name.
- Description – optional, but helps you recall the task's purpose later.
- AI model – select the language model that performs the categorization.
- Reacts to label/folder – specify which folder or label the categorization applies to. In Gmail these are labels, in Outlook folders. Enter Inbox to process every email in the inbox. You can also limit processing to a specific subfolder by entering its name.
Define categorization
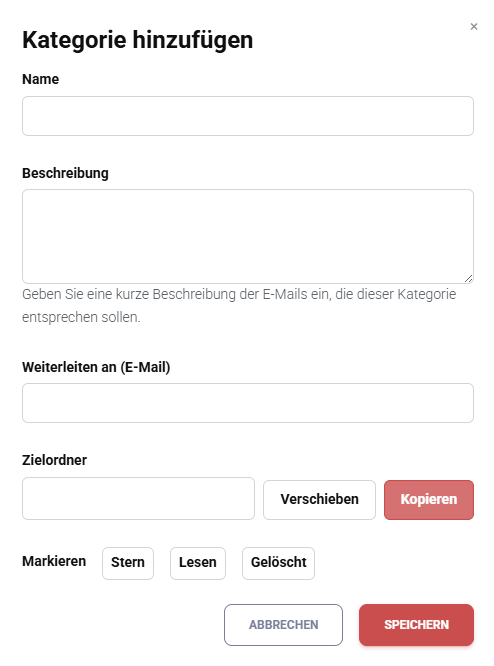
In the second section, you create the actual categories. Click + Category to add a new category. A pop-up window opens where you configure the category.
Name and description
Give the category a name and write a description. The description is important for the AI: it explains when an email should be assigned to this category. Describe the category in one sentence and add two to three examples if needed.
Example for the Newsletter category: Regularly sent bulletins with general information, offers, or updates – e.g. weekly industry news, product updates, or event announcements.
Forwarding
You can set emails in this category to be forwarded to a specific address. This is useful for customer service escalations: create a category called Escalation, describe when an email counts as an escalation, and forward it directly to a manager or specialist.
Target folder
Define which folder (Outlook) or label (Gmail) the email is moved or copied to when the category matches. Enter the folder name manually. If the name matches an existing folder, that folder is used. If the folder does not exist yet, it is created automatically.
Use the button to switch between Move and Copy.
Additional actions
You can also define what happens to the email when the category matches:
- mark with a star
- mark as read
- delete directly
Click Save to store the category. You can add as many categories as you like.
Testing
In the third section, you test whether the categorization works as intended.
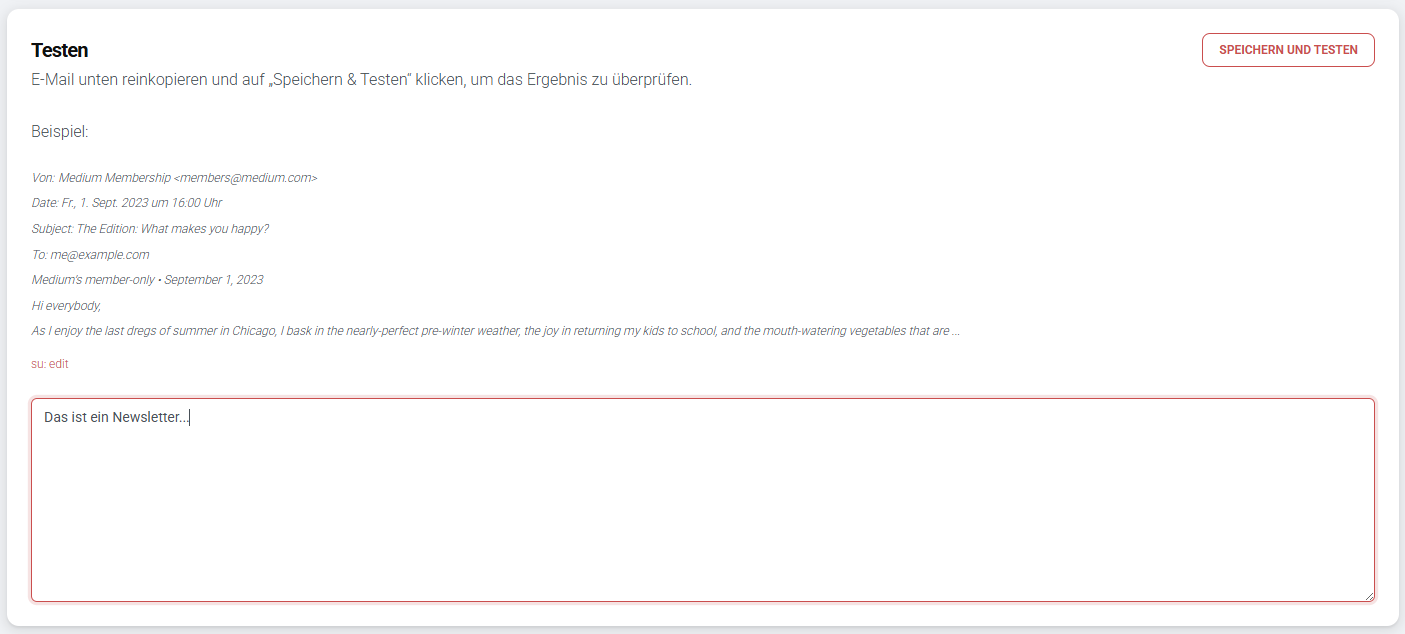
Paste any email into the input field and click Save and Test. Below the input field, the result is displayed – the category that matches the pasted email. This lets you quickly verify that your categories and descriptions work correctly before activating the task.
Related topics
- Inbox Setup – connect mailbox and manage tasks
- Email Response – automatically respond to emails
- Introduction – what the Email feature offers