In-Person Meetings
For on-site conversations, you can record audio, have it automatically transcribed, and further processed by AI agents. This is suitable for in-person meetings, discussions, or workshops where no automatic online meeting recording is available.
You record the conversation with your device's microphone. The AI automatically converts the spoken content into text (transcription). An AI agent can then further process the transcript – for example, creating summaries, generating structured reports, or extracting to-dos and decisions.
Konversa access required
The Recordings feature is only visible if you have additional access to Konversa. Without this access, the Recordings menu item does not appear in the side menu. Contact your administrator if access is missing.
Browser requirement
Google Chrome is required for recordings. Other browsers – especially Safari or iOS shortcuts – can cause recordings to not work correctly. On Apple devices, home screen shortcuts always open web pages in Safari. Always open the recording page directly in Chrome and save it as a bookmark.
Open recordings
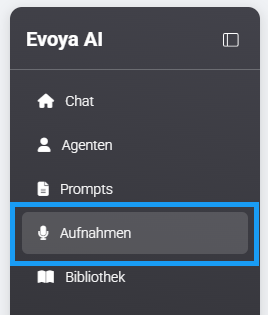
Click on Recordings in the side menu. You will be taken to the recordings overview, where all existing recordings are displayed with their status.
Start recording
At the top right, you have two options: Record and Upload File.

Record
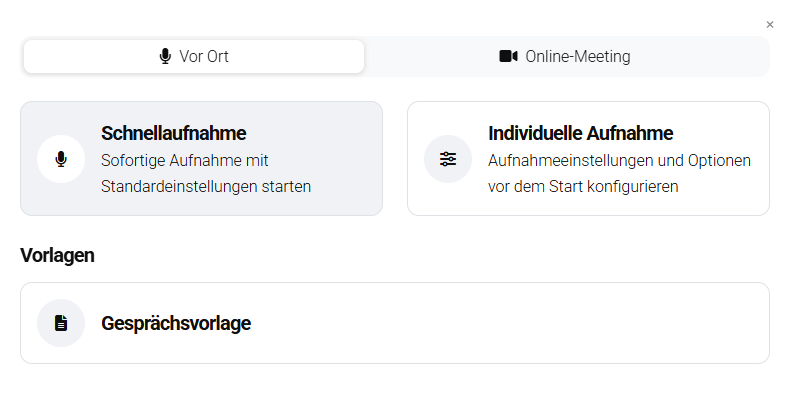
Starts a new live recording. After clicking the Record button, a pop-up opens with three options:
The access type determines who can see and access a recording: Private means the recording is visible only to the creator. Team makes it accessible to all users in the workspace. A detailed explanation can be found on the Access Types page.
Quick Recording is suitable for spontaneous conversations. Recording starts immediately without requiring prior configuration. The access type is automatically set to Private and can be adjusted afterwards.
Custom Recording allows you to define the title, description, language, participants, and processing options before starting. The access type is also defined in advance. Optionally, additional context for AI processing can be provided, such as the purpose or background of the conversation.
Templates contain preconfigured settings for recurring use cases. When starting the recording, both the configured processing and the defined access type are automatically applied.
Upload File
Allows uploading an existing audio file. The configuration corresponds to custom recording, supplemented with the file upload.

End recording and processing
During recording, Pause, Stop, and Cancel are available.
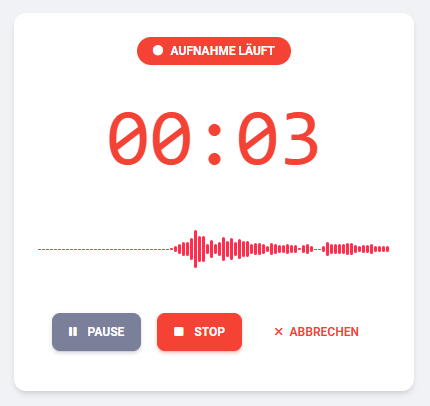
After clicking Stop, the recording is completed, the conversation is transcribed, and the transcript is processed according to the selected options.
Status and overview
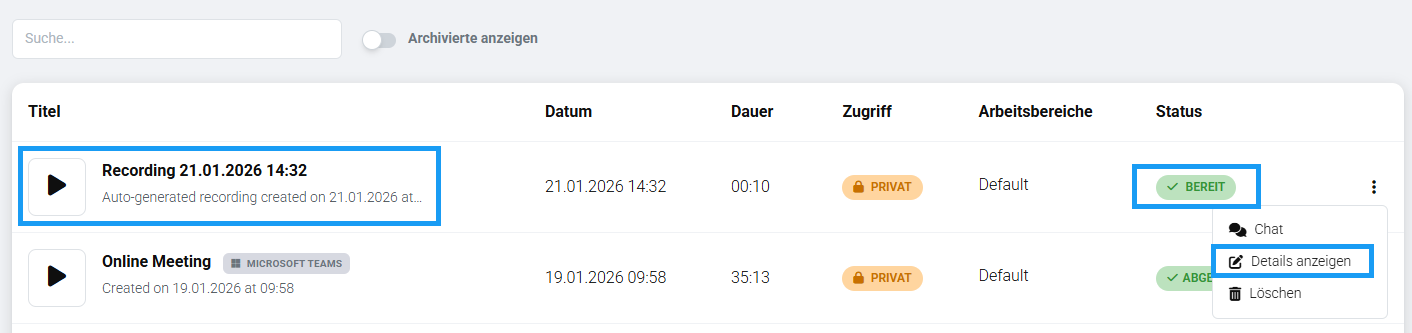
In the recordings overview, the status column shows the current state. Once all steps are completed, the status changes to Ready. You can access the detail view by clicking on the title or via the three-dot menu → Show Details.
Recording detail view
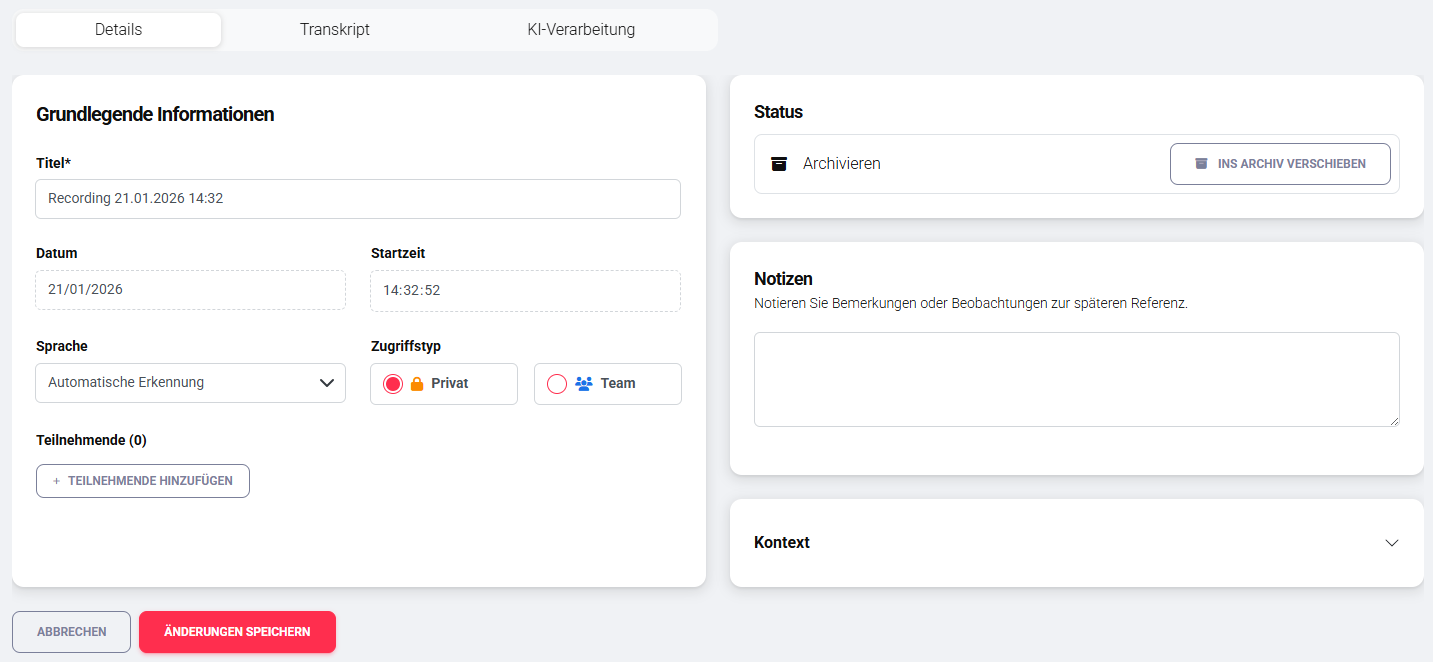
The detail view is divided into three tabs: Details, Transcript, and AI Processing.
In the Details tab, the title (editable), start date and time, language, access type, and participants are displayed. On the right are the status and the Archive option. Archived recordings are no longer displayed in the standard list view but can be shown again using the filter option Show Archived.
Transcript
In the Transcript tab, the complete conversation is displayed as text together with the audio player. Play allows you to play back the conversation, with the currently spoken text automatically highlighted. Clicking on any text position moves the audio playback to the corresponding position.
For editing, hovering over a text position reveals an Edit button, through which manual adjustments can be made. The entire transcript can be searched using the search field. With the Regenerate Transcript function, the complete transcript can be recreated – this completely replaces the existing transcript.
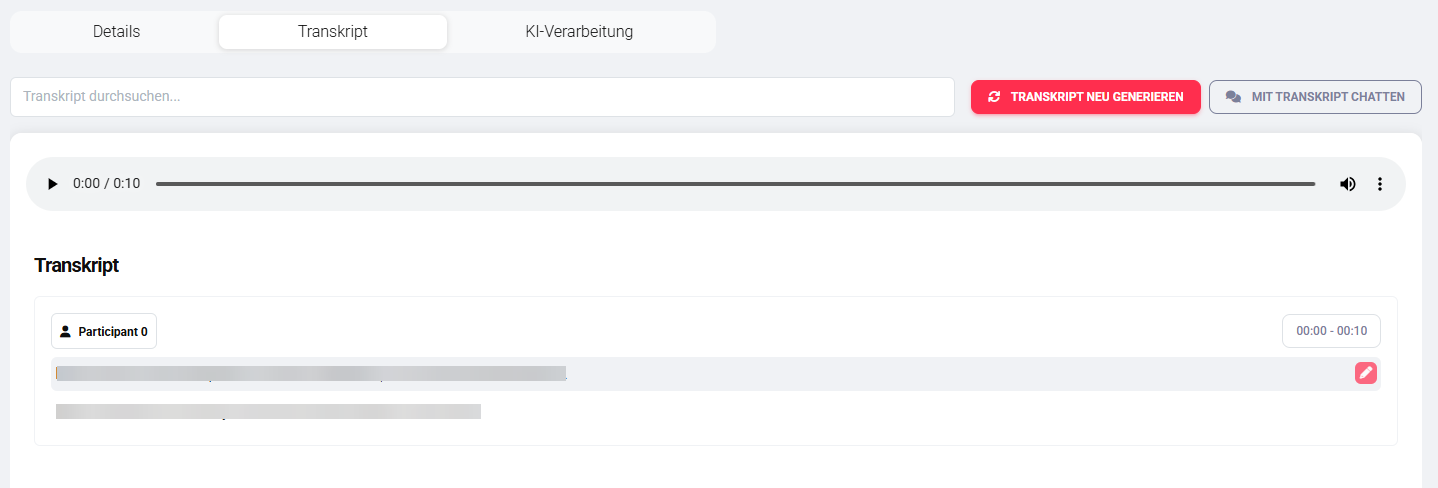
Via Chat with Transcript, the entire transcript is passed to an AI agent. Select the agent and the transcript is copied into a new chat.
AI processing
The AI Processing tab shows all defined AI processes for this recording. On the left, available processing processes are displayed, such as summaries or structured reports. All processes work based on the transcript.
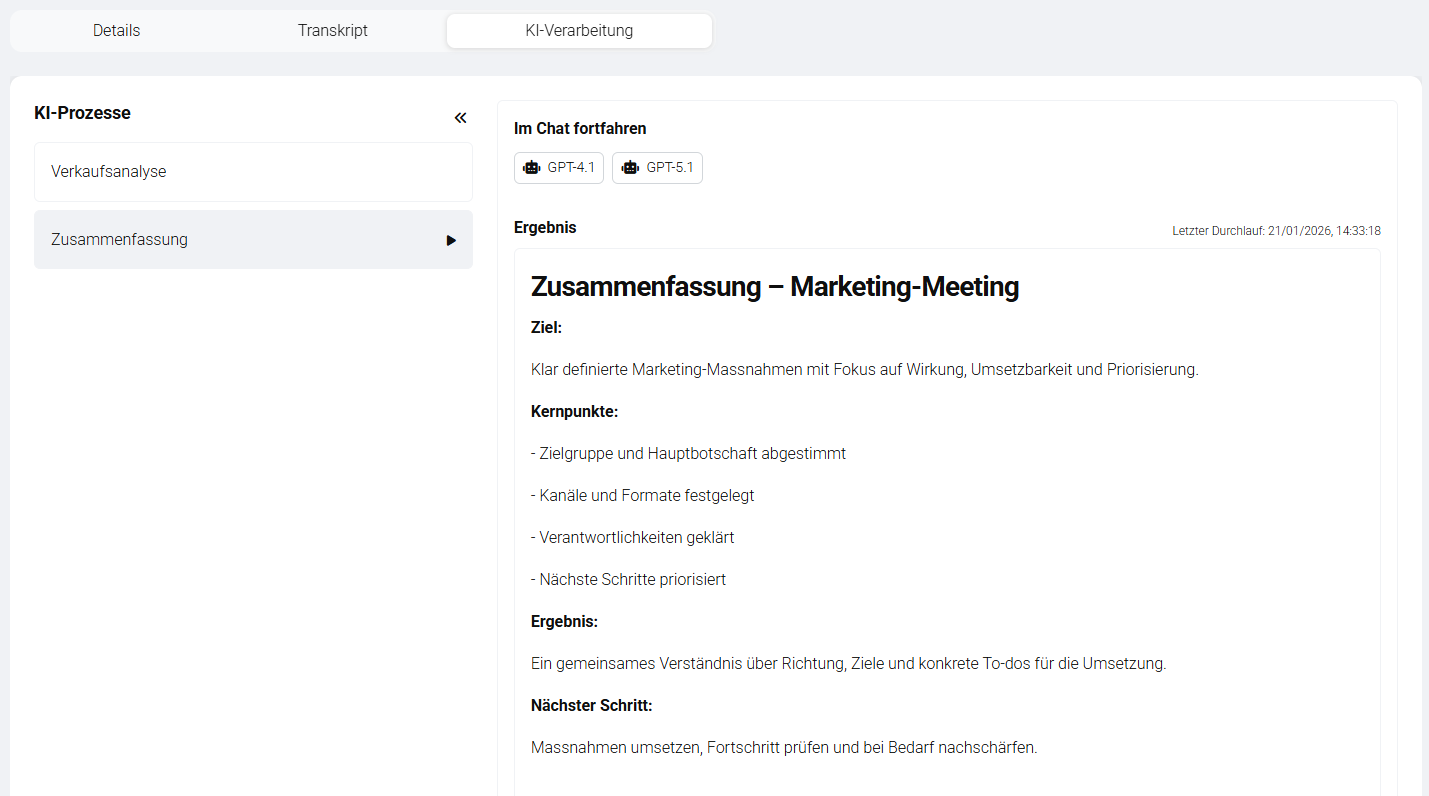
Depending on the configuration, a process starts automatically after transcription or must be started manually via the play icon. After completion, the result is displayed directly. The result of an AI process can be passed to an AI agent – in this case, not the transcript but the processing result is copied into the chat.
Further processing in AI chat
Regardless of whether the chat was started from the transcript or from a processing result: select an agent, the content is copied into a new chat, and you switch to the AI chat. There you can write or dictate, upload additional files, and analyze, revise, or expand content.
→ Detailed guide to AI Chat: Core Features
Delete recordings
Recordings can be deleted via the recordings overview. Open the three-dot menu in the corresponding row and select Delete.

When deleting a recording, all associated data is permanently removed. This includes the recording itself (audio), the transcript, and all processing results generated from it. The deletion is permanent and cannot be undone.